
A kitchen can have plenty of cabinets and still feel disorganized. Pans may live across the room from the stove, ingredients disappear at the back of deep shelves, utensils compete inside one crowded drawer, and the counters slowly become permanent storage for appliances, mail, oils, and everything that never found a proper home.
The most effective kitchen organization ideas do not begin with buying more bins. They begin with how you actually use the room. A practical kitchen puts things close to the tasks they support, gives the easiest storage to everyday items, and protects enough clear counter space for cooking and preparation.
A simple framework is:
Zone → prioritize → place → contain → clear → reset
Organize the Kitchen by Workflow First
Before reorganizing individual drawers and cabinets, think about the jobs your kitchen performs.
Most kitchens can be divided into a few practical zones.
Food Storage Zone
This may include:
- Pantry foods
- Snacks
- Baking ingredients
- Breakfast supplies
- Refrigerator-related overflow
The goal is to keep shelf-stable foods visible and easy to reach.
Prep Zone
This is where you prepare ingredients.
Useful items nearby may include:
- Cutting boards
- Knives
- Mixing bowls
- Measuring cups
- Measuring spoons
- Peelers
- Frequently used ingredients
Cooking Zone
This usually centers around the stove or cooktop.
Keep nearby:
- Pots
- Pans
- Spatulas
- Wooden spoons
- Ladles
- Tongs
- Pot holders
- Regularly used seasonings
Cleanup Zone
This often centers around the sink and dishwasher.
Possible items include:
- Dishwashing products
- Cleaning cloths
- Towels
- Waste bags
- Recycling supplies
- Cleaning products stored appropriately
Serving Zone
This may include:
- Plates
- Bowls
- Glasses
- Cutlery
- Serving utensils
If possible, place these near the dishwasher or the route toward the dining area.
Put Items Near the Task They Support
The more often you use something during a task, the closer it should be to that task.
For example:
Near the stove
- Frying pan
- Saucepan
- Spatula
- Cooking spoons
Near the prep counter
- Cutting board
- Knives
- Mixing bowl
- Measuring tools
Near the sink or dishwasher
- Plates
- Glasses
- Cutlery
- Dish towels
Near the coffee maker
- Mugs
- Coffee
- Filters
- Related accessories
This is usually more practical than grouping everything solely by object type.
Prioritize Frequency Over Symmetry
Your best storage should go to the things you use most.
Easy-to-reach locations are better for:
- Everyday cookware
- Daily dishes
- Frequently used utensils
- Regular ingredients
Harder-to-reach shelves can handle:
- Holiday serving pieces
- Specialty appliances
- Large platters
- Occasional baking equipment
The goal is not perfect visual symmetry. It is fewer unnecessary movements while cooking and cleaning.
Edit Before You Buy Organizers
Bins, dividers, and shelf risers can help, but only after you decide what deserves space.
Work One Zone at a Time
Instead of emptying the entire kitchen at once, try this order:
- Utensil drawers
- Cooking cabinet
- Food-storage cabinet
- Dishes
- Countertops
- Specialty and overflow storage
This keeps the kitchen usable while you work.
Sort Into Practical Groups
Use categories such as:
- Keep here
- Move to another kitchen zone
- Store elsewhere
- Donate where appropriate
- Discard appropriately
Remove Broken and Unused Duplicates
Look for:
- Chipped containers
- Containers without lids
- Lids without containers
- Damaged utensils
- Duplicate gadgets
- Appliances you no longer use
If three tools perform the same job but you only use one, prime kitchen storage may not be the best place for all three.
Clean Before Restocking
When a cabinet or drawer is empty:
- Wipe shelves
- Clean drawer interiors
- Reach into corners
- Let appropriate surfaces dry
Use cleaning products suitable for the cabinet material and finish.
Organize Cabinets by Accessibility
Not every cabinet position is equally useful.
Put Everyday Items at Easy Reach
Prime cabinet areas are good for:
- Plates
- Bowls
- Glasses
- Everyday ingredients
Less accessible storage can hold:
- Seasonal dishes
- Specialty cookware
- Occasional serving pieces
Use Shelf Inserts Where Height Is Wasted
A tall cabinet shelf can waste space if short items sit on only one level.
Shelf inserts can create another layer for:
- Mugs
- Bowls
- Small plates
- Food jars
The objective is to add useful levels without making items difficult to remove.
Use Bins in Deep Cabinets
Deep cabinets often become cluttered because the back disappears from view.
Use handled or narrow bins for categories such as:
- Baking supplies
- Snacks
- Breakfast foods
- Sauce packets
- Small pantry items
Instead of reaching behind several products, pull out the entire category.
Make Corner Cabinets Easier to Reach
Corner cabinets can benefit from:
- Turntables
- Carousels
- Pull-out systems
These options can reduce the amount of hidden space at the back.
Always check:
- Cabinet dimensions
- Hardware compatibility
- Load limits
before installing a system.
Avoid Filling Every Inch
A cabinet is not well organized if removing one item requires shifting five others.
Leave enough room to:
- See what you own
- Take items out
- Put them back easily
Store Pots, Pans, and Lids Near the Cooking Zone
Cookware takes up a lot of space, so visibility matters.
Keep Daily Cookware Closest to the Stove
Good candidates include:
- Main frying pan
- Everyday saucepan
- Frequently used pot
Specialty cookware can sit farther away.
Avoid Deep Pan Towers
Nesting cookware can save space, but stacking too many pieces can make the lowest pan inconvenient.
Alternatives include:
- Deep drawer
- Pull-out cabinet
- Vertical pan rack
- Adjustable organizer
If you do stack cookware, follow the care guidance for its finish to avoid unnecessary scratching or damage.
Store Lids Separately When It Helps
Possible options include:
- Vertical lid rack
- Drawer divider
- Compatible cabinet-door organizer
Keeping lids upright can make matching them to pots easier.
Keep Heavy Cookware Lower
Heavy pots are often easier to handle from:
- Lower cabinet
- Deep drawer
- Pull-out
than from a high overhead shelf.
Check the cabinet or drawer manufacturer’s load limits rather than assuming any shelf can support very heavy cookware.
Organize Kitchen Drawers by Function
Drawers work best when they contain related tools.
Give Cutlery a Defined Layout
A tray or divider can separate:
- Forks
- Spoons
- Table knives
- Serving utensils
This makes items visible and easier to return.
Create a Cooking-Utensil Drawer
Possible contents:
- Spatulas
- Wooden spoons
- Tongs
- Ladles
- Whisks
Keep this drawer near the stove where possible.
Separate Prep Tools
One drawer or section can hold:
- Measuring spoons
- Measuring cups
- Peeler
- Can opener
- Small grater
Store Knives Properly
Avoid loose sharp knives mixed with general utensils.
Use a suitable:
- Knife tray
- Knife block
- Other compatible storage system
The exact storage method should match your knives and the manufacturer’s care guidance.
Avoid the Catch-All Drawer Problem
A miscellaneous drawer can work if the contents are genuinely related.
It stops working when it contains:
- Batteries
- Coupons
- Chargers
- Screwdrivers
- Pens
- Takeout menus
- Random kitchen tools
If the drawer contains unrelated categories, divide them or move them elsewhere.
Create a Food-Storage System You Can See
Pantry organization should make food easier to identify and use while keeping it stored appropriately.
Group Shelf-Stable Foods by Use
Useful categories may include:
- Breakfast
- Pasta and grains
- Baking
- Snacks
- Canned foods
- Sauces and condiments
Keep Everyday Foods Most Accessible
Place regular staples where you can see them.
Move:
- Specialty ingredients
- Rarely used baking supplies
- Backup packages
to higher or farther-back storage.
Use Clear Containers Selectively
Appropriate containers can be useful for dry foods such as:
- Rice
- Pasta
- Cereal
- Dry beans
where suitable.
Shelf-stable foods should be stored in a clean, cool, dry place, and some can benefit from appropriate glass or plastic containers.
Don’t Decant Everything for Appearance
Matching pantry jars can look neat, but they are not required for good organization.
Original packaging may contain:
- Ingredient information
- Preparation instructions
- Lot information
- Best-by or use information
If you transfer food, preserve the information you may need.
Rotate Older Food Forward
A simple first-in, first-out habit can reduce forgotten packages.
When practical:
- Put newer products behind older ones.
- Check open packages before opening another.
- Group duplicates together.
For actual food-storage durations, use current USDA, FDA, or FoodKeeper guidance rather than guessing.
Keep Perishable Foods in the Correct Storage
Do not treat pantry organization as a reason to leave foods out that require refrigeration.
Return perishable foods to appropriate cold storage according to food-safety guidance.
Use Countertops as Work Surfaces
Counter clutter often makes a kitchen feel disorganized even when the cabinets are tidy.
Keep Only Regular-Use Items Out
Examples may include:
- Daily coffee maker
- Kettle
- Frequently used utensil holder
Occasional appliances usually do not need permanent counter space.
Protect Your Best Prep Surface
Identify the counter area where you actually prepare food.
Try not to fill it with:
- Decorative objects
- Bulk food
- Small appliances
- Storage baskets
Clear work space is more useful than beautifully arranged clutter.
Use Trays to Group Everyday Items
A tray can contain a small working group.
For example:
Cooking tray
- Oil
- Salt
- Pepper
Coffee tray
- Coffee accessories
- Sugar container
The tray can make items feel more intentional and makes it easier to lift the whole group when wiping the counter.
Store Appliances by Frequency
A practical system:
Daily use
→ Counter
Several times per week
→ Easy-reach cabinet
Occasional use
→ Secondary storage
Your own routine should determine the categories.
Don’t Overuse Wall Rails and Hooks
Vertical storage can free counter space, but covering the wall with every kitchen tool can create another form of clutter.
Keep visible only what is useful.
Give Small Appliances a Real Home
Small appliances often consume more counter space than anything else.
Sort Them by How Often You Use Them
Possible categories:
Daily
- Coffee maker
- Kettle
- Toaster
Weekly
- Blender
- Food processor
- Stand mixer
Occasional
- Waffle maker
- Specialty cooker
- Seasonal appliance
These are examples only. Your actual use matters more.
Store Heavy Appliances Where They Are Practical to Lift
Avoid placing a heavy appliance on a difficult overhead shelf if retrieving it becomes inconvenient.
There is no universal weight limit; cabinet capacity and your own comfort matter.
Keep Accessories With the Appliance
Store:
- Blender attachments
- Processor blades
- Mixer tools
in the same cabinet or a nearby labeled bin.
An appliance is much more useful when its accessories can be found immediately.
Follow Appliance Placement Requirements
Countertop appliances may require specific:
- Ventilation
- Heat clearance
- Electrical setup
- Storage orientation
Follow the manufacturer’s instructions rather than pushing appliances tightly into unsuitable spaces.
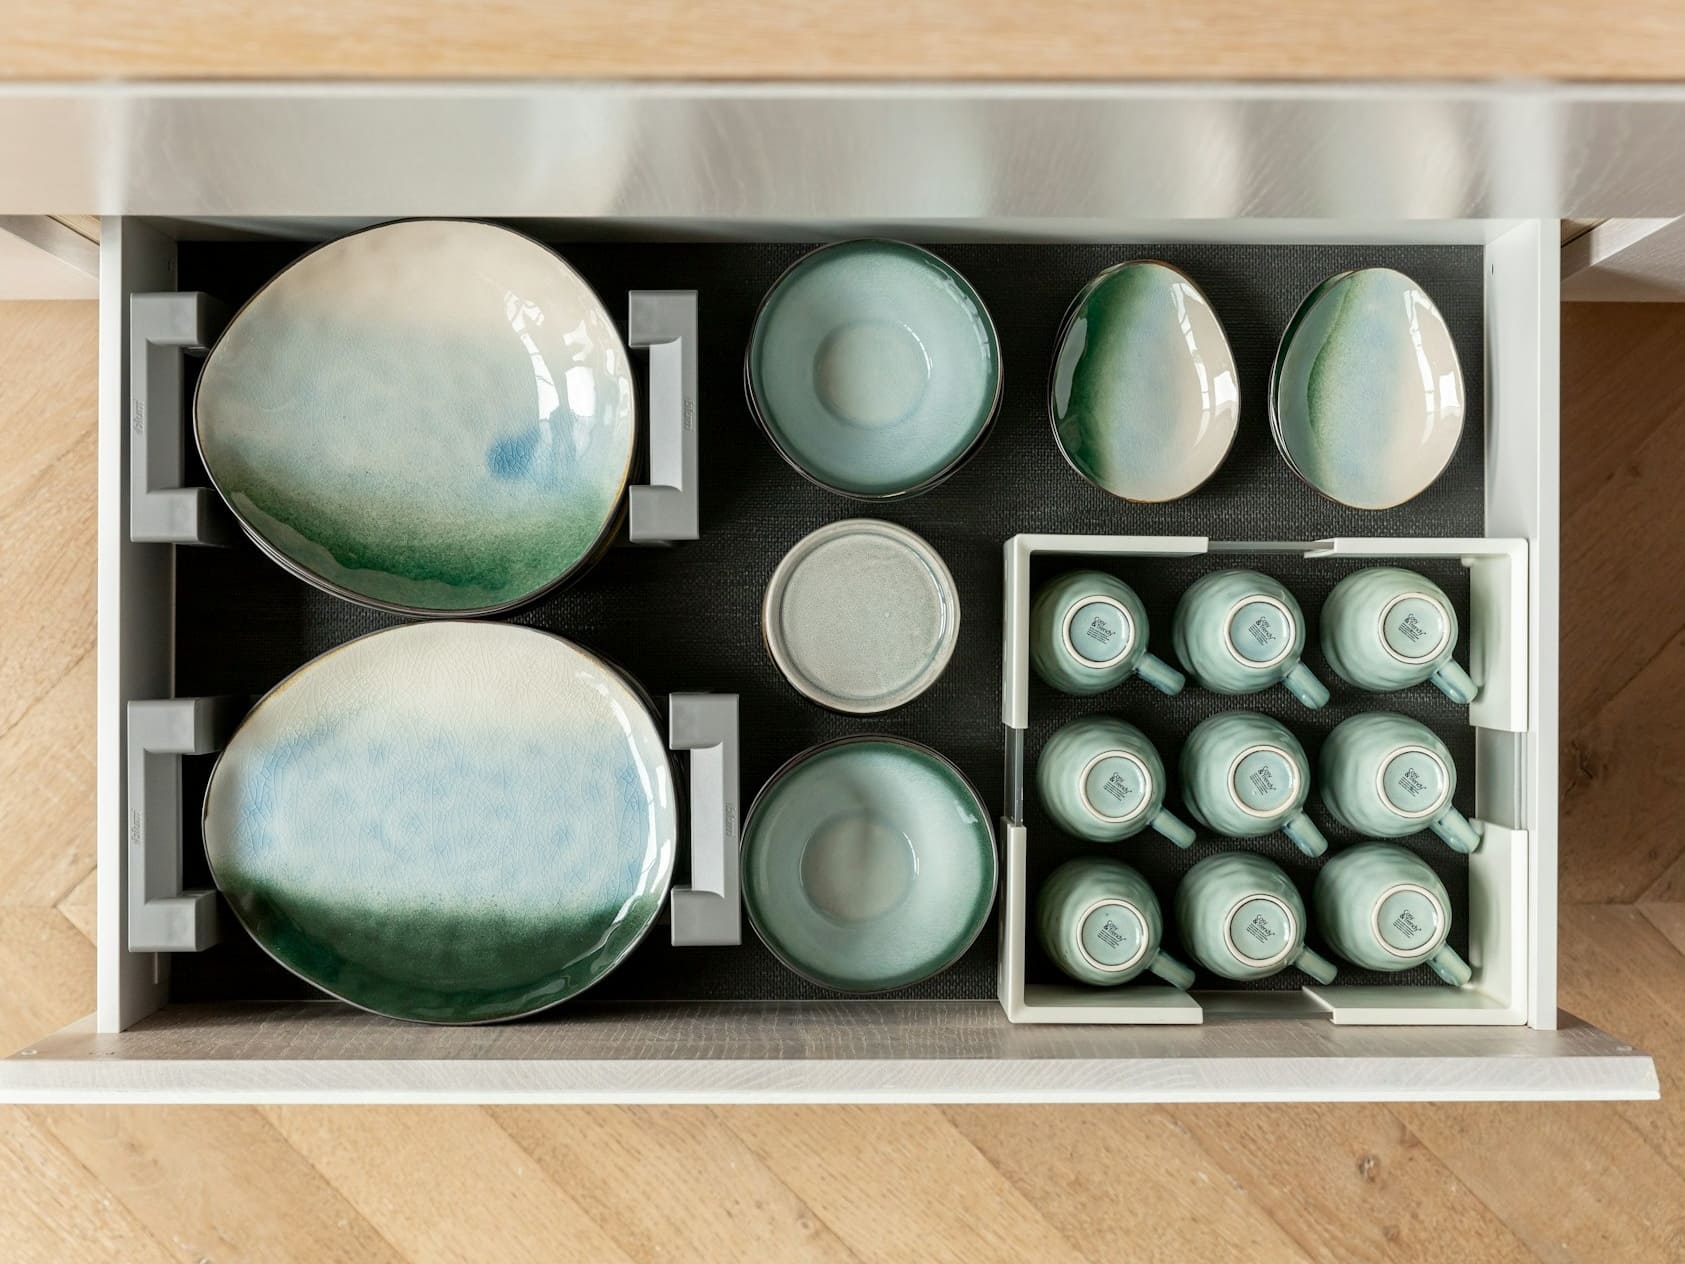
Use Deep Drawers and Pull-Outs for Bulky Items
Deep storage can work especially well below counter height because you can see contents from above.
Good Candidates
Deep drawers can hold:
- Pots
- Pans
- Mixing bowls
- Food-storage containers
- Small appliances
Add Dividers Where Items Shift
Dividers can help with:
- Baking dishes
- Pot lids
- Cutting boards
- Food-container lids
Keep Containers and Lids Together
Possible systems include:
- Nest containers
- Store lids vertically
- Separate lids by size
- Group matching shapes
Remove unmatched pieces rather than keeping them indefinitely.
Put Frequent Items Toward the Front
Everyday pieces at front.
Occasional items toward the back.
This keeps deep storage usable without digging.
Check the Drawer Under the Oven Before Using It for Storage
The drawer beneath a range is not automatically general storage.
It may be:
- Storage drawer
- Warming drawer
- Broiler drawer
- Another appliance-specific compartment
Confirm Its Purpose
Check the oven or range manual.
A true storage drawer may be designed for appropriate heat-safe cookware.
A warming drawer has a different function and should not be treated like a normal cabinet.
Don’t Store Random Household Items There
Even designated storage drawers can become warm during cooking or cleaning cycles.
Depending on the appliance, items such as:
- Paper
- Towels
- Cookbooks
- Shelf liners
may be inappropriate.
Follow the exact manufacturer instructions.
Kitchen Organization by Zone at a Glance
| Kitchen Zone | Keep Nearby | Best Storage Types | Keep Off the Counter When Possible |
|---|---|---|---|
| Food storage | Dry goods, snacks, baking supplies | Cabinets, pantry bins, clear containers | Bulk overflow |
| Prep | Knives, boards, bowls, measuring tools | Drawers, dividers, lower cabinets | Rare gadgets |
| Cooking | Pots, pans, spatulas, utensils | Deep drawers, nearby cabinets | Specialty cookware |
| Cleanup | Dish supplies, cloths, waste bags | Under-sink zones, drawers | Backup stock |
| Serving | Plates, bowls, glasses, cutlery | Cabinets near dishwasher/table | Occasional serving pieces |
| Coffee/breakfast | Daily machine, mugs, supplies | Small counter zone + cabinet | Bulk refills |
| Baking | Ingredients, pans, measuring tools | One cabinet, drawer, or bin group | Rare baking equipment |
| Appliances | Regular-use appliances | Counter or deep cabinet | Occasional appliances |
| Food containers | Containers and matching lids | Deep drawer or cabinet | Unmatched pieces |
| Maintenance | Cloths, labels, overflow items | Small dedicated zone | Random household clutter |
Adapt these zones to your own kitchen.
The goal is not to copy a standard diagram. It is to shorten the distance between an item and the task it supports.
Common Kitchen Organization Mistakes
Buying Organizers Before Decluttering
Bins do not solve excess volume.
Edit first.
Organizing by Object Instead of Task
Keeping every bowl together may make sense, but not always.
A mixing bowl used mainly for baking may be more useful beside baking supplies than near serving bowls.
Giving Prime Storage to Rarely Used Items
Daily cookware should not sit behind holiday serving dishes.
Stacking Cookware Too Deeply
If you must remove several pans to reach the one you use every day, change the setup.
Keeping Every Appliance on the Counter
Counter space is valuable.
Give it to appliances that earn it through frequent use.
Decanting Every Pantry Product
Matching containers are optional.
Visibility and appropriate food storage matter more than appearance.
Creating Too Many Categories
You do not need twelve tiny categories when four useful groups will do.
Overcomplicated systems are harder to maintain.
Forgetting Maintenance
A system that takes too much effort to reset will gradually fall apart.
Assuming the Under-Oven Drawer Is Storage
Always check the appliance manual.
Organize the Kitchen in the Right Order
If you are reorganizing the whole room, use this sequence.
Step 1: Identify the Main Activities
List:
- Food storage
- Prep
- Cooking
- Cleanup
- Serving
Step 2: Map the Storage You Already Have
Notice:
- Easy-reach drawers
- Deep cabinets
- High shelves
- Corners
- Counter space
Step 3: Remove What Does Not Belong
Relocate, donate, or discard items as appropriate.
Step 4: Give Daily Items Prime Storage
The things you use most should be easiest to reach.
Step 5: Move Items Toward Their Task
Move:
- Pots toward cooking
- Knives toward prep
- Dishes toward cleanup or serving
- Coffee supplies toward the coffee station
Step 6: Solve the Bulky Categories
Focus on:
- Cookware
- Lids
- Appliances
- Food containers
These are often the biggest space problems.
Step 7: Add Organizers
Only now add:
- Drawer dividers
- Shelf inserts
- Bins
- Pull-outs
The organizers should support a system you already understand.
Step 8: Clear the Countertops
Keep out only items that deserve daily access.
Step 9: Review Food Storage
Bring older items forward and keep dry goods stored in suitable conditions.
Step 10: Create a Reset Routine
Return stray items after:
- Dinner cleanup
- Grocery unpacking
- Baking
- Weekly cleaning
The whole process is:
Zone → prioritize → place → contain → clear → reset
Maintain the Kitchen With Small Resets
A good system should not require a full kitchen reorganization every month.
Reset the Counters Regularly
Return:
- Appliances
- Ingredients
- Containers
- Dishes
to their assigned homes.
Reset While Unpacking Groceries
Grocery day is a useful time to:
- Bring older food forward
- Group duplicates
- Remove empty packages
- Notice what should be used soon
Check One Problem Zone at a Time
You do not need to reorganize everything at once.
For example:
- Utensil drawer one day
- Pantry on grocery day
- Baking area after baking
- Counters during weekly cleaning
The exact schedule does not matter.
Consistency does.
Change the System When Your Routine Changes
Your kitchen should adapt when:
- Household size changes
- Cooking habits change
- A new appliance arrives
- Children start using the kitchen
- Frequently used ingredients change
An organization system should serve the household you have now.
Frequently Asked Questions About Kitchen Organization
What Are the Best Kitchen Organization Ideas?
Start with workflow rather than products.
Create zones for:
- Food storage
- Preparation
- Cooking
- Cleanup
- Serving
Then place everyday items close to the tasks they support.
How Should I Organize Kitchen Cabinets?
Use your easiest-to-reach cabinets for frequently used items.
Group contents according to:
- Task
- Frequency
- Size
Use bins, shelf inserts, or pull-outs only when they improve visibility and access.
What Should Go in Kitchen Drawers?
Useful drawer categories include:
- Cutlery
- Cooking utensils
- Prep tools
- Knives in appropriate storage
- Wraps
- Food-storage containers
Avoid mixing too many unrelated categories.
How Do I Organize Pots and Pans?
Keep frequently used cookware near the cooking zone.
Depending on your kitchen, useful options include:
- Deep drawers
- Pull-outs
- Vertical organizers
- Separate lid storage
How Do I Reduce Kitchen Counter Clutter?
Keep only genuinely frequent-use items on the worktop.
Store occasional appliances elsewhere and use trays to contain small everyday groups such as oils, seasonings, or coffee supplies.
Should Pantry Food Be Transferred Into Containers?
Not necessarily.
Some dry foods can benefit from appropriate plastic or glass containers, but matching jars are not required for good organization.
Keep shelf-stable foods in suitable clean, dry conditions and preserve important package information when transferring products.
What Should I Store in the Drawer Under My Oven?
Check the range manual.
Some appliances have genuine storage drawers, while others have warming or broiler drawers.
Even designated storage drawers may have restrictions on permitted contents.
Conclusion
A well-organized kitchen is not the one with the most bins, matching jars, or drawer dividers.
It is the one where the things you use are located where you use them.
Use this framework:
Zone → prioritize → place → contain → clear → reset
Build the kitchen around food storage, prep, cooking, cleanup, and serving. Give the best storage positions to everyday items. Keep cookware close to the stove, utensils near the tasks they support, and pantry food visible enough that you know what you have.
Protect counter space for actual kitchen work rather than turning it into permanent storage. Give occasional appliances a cabinet home, use deep drawers and pull-outs to improve visibility, and check appliance-specific compartments before storing anything in them.
Finally, keep the system simple enough to maintain.
Choose one daily task today—making coffee, preparing dinner, or unloading the dishwasher—and reorganize only the items involved in that task. Once that zone works better, move on to the next one.