
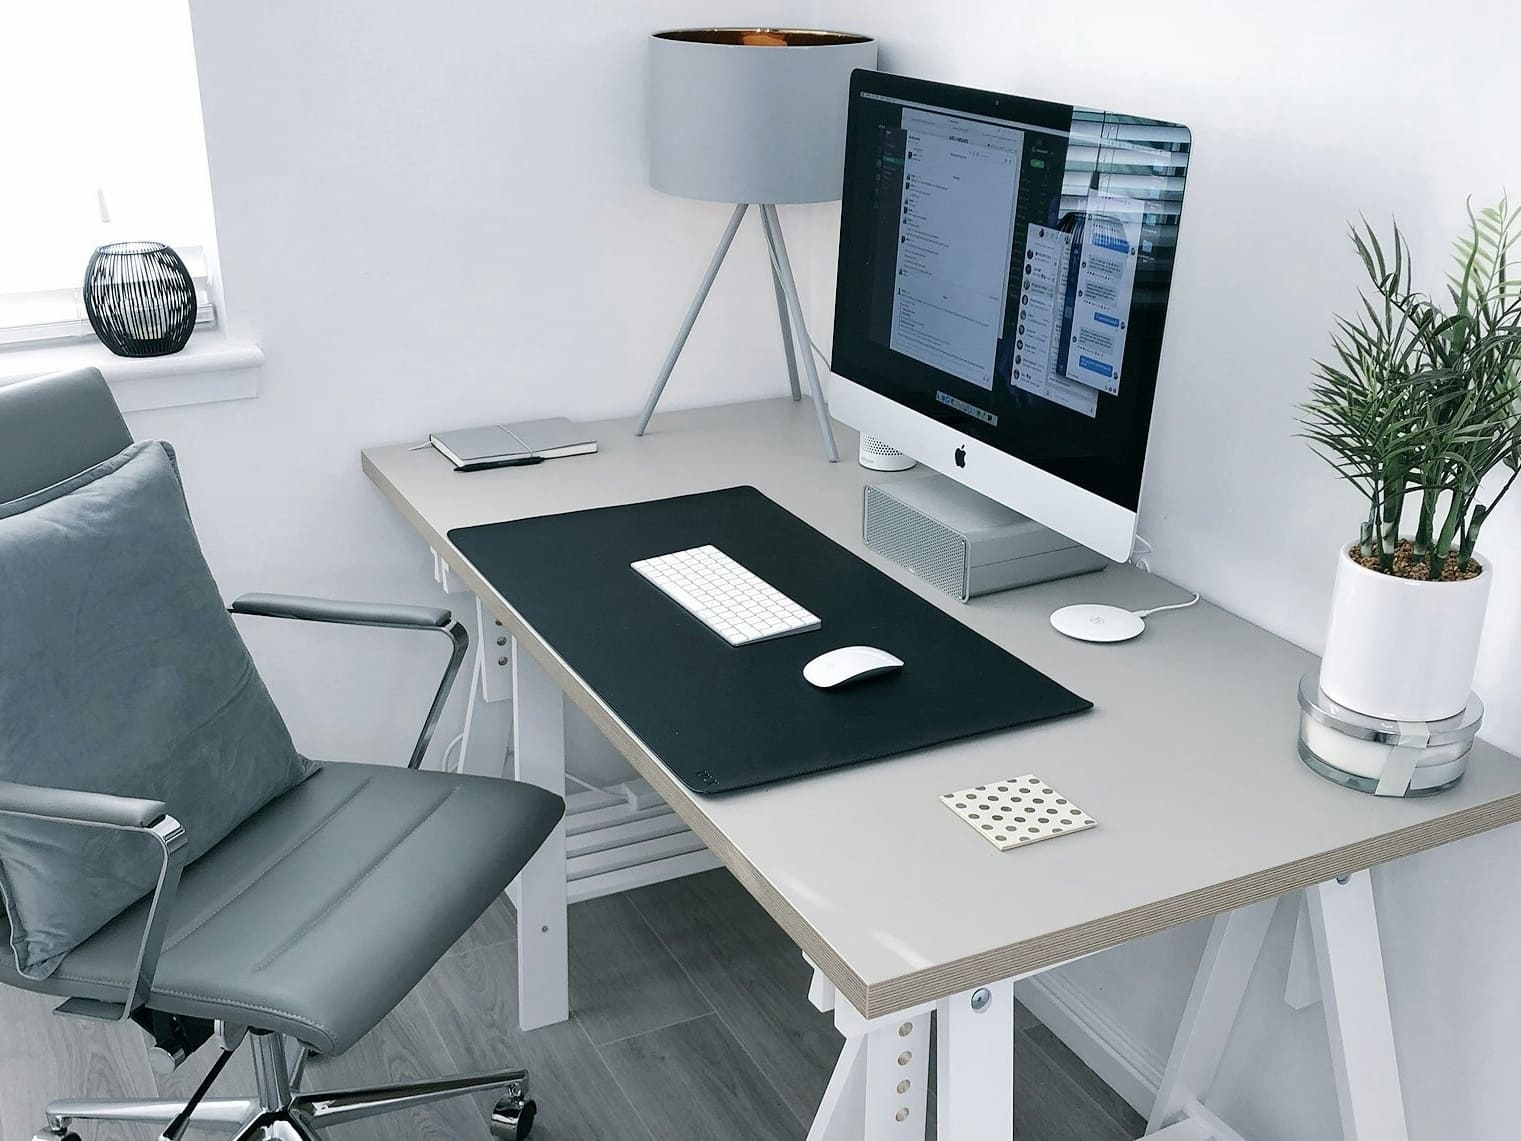
A home office can become cluttered even when you technically have enough storage. Papers stay on the desk because there is no clear next step for them. Chargers cross the work surface. Pens end up in several drawers. Downloads pile up on the computer while physical folders pile up beside it.
The most useful home office organization ideas focus on workflow rather than simply adding containers. An organized workspace should make the next action obvious: what stays on your desk, what gets filed, what moves into storage, what gets deleted, and what needs to leave the office entirely.
The goal is to organize by frequency and function. Keep the tools you use every day within easy reach, move occasional supplies into secondary storage, give paperwork a clear path, control cables, organize digital files, and use short reset routines to keep everything working.
Start With What Your Home Office Actually Needs to Support
Before buying drawer dividers, shelves, or cable organizers, decide what happens in your workspace.
List Your Main Work Activities
Your office might need to support:
- Laptop or desktop work
- Video calls
- Reading
- Writing by hand
- Reviewing printed documents
- Filing paperwork
- Creative work
- Packaging or shipping
- Studying
- Household administration
A workspace used mainly for computer work needs a different setup from one used for drawing, paperwork, or packing orders.
Identify What You Reach for Every Day
Your most frequently used tools deserve the most accessible locations.
Examples include:
- Keyboard
- Mouse
- Notebook
- Phone
- Headphones
- Pen
- Charger
- Current project documents
These items should not compete with archived paperwork, spare supplies, or equipment you use once a month.
Separate Work Tools From Things That Simply Ended Up in the Office
Home offices often become storage zones for unrelated household items.
Look for:
- Household paperwork
- Spare cables
- Unrelated books
- Craft materials
- Returns
- Shipping boxes
- Miscellaneous electronics
Decide what genuinely belongs in the workspace.
Removing unrelated storage can sometimes improve the office before you add a single organizer.
Create Desk Zones Based on How Often You Use Things
Your desktop contains the most valuable storage space in the office because it is the easiest area to reach.
Use that space deliberately.
Zone 1: Immediate Work Area
Keep only frequently used work tools here.
Possible items include:
- Keyboard
- Mouse
- Laptop
- Current notebook
- Pen
- Phone if necessary
- One active document
The center of the desk should remain usable for actual work.
Avoid covering it with organizers simply because the surface is available.
Zone 2: Reachable Secondary Items
These are things you use regularly but do not need constantly.
Examples:
- Stapler
- Headphones
- Notepad
- Reference book
- Calculator
- Frequently used charger
Good locations include:
- Top drawer
- Nearby shelf
- Desk organizer
- Hook
- Monitor riser with storage
The goal is to keep these items close without letting them dominate the main work zone.
Zone 3: Occasional Supplies
Move less frequently used items farther away.
Examples:
- Extra notebooks
- Printer paper
- Spare stationery
- Replacement cables
- Archived reference material
These can live in:
- Lower drawers
- Cabinets
- Bookcases
- Labeled boxes
You do not need three packs of printer paper within arm’s reach simply because they are office supplies.
Keep Some Desk Space Empty
Empty desk space is useful.
Leave a defined area where you can:
- Write
- Sign documents
- Review paperwork
- Open a notebook
- Place a temporary project
Do not treat every available square centimeter as storage.
Organize the Desk Around Comfortable Computer Placement
Storage should fit around your workstation rather than forcing your equipment into awkward positions.
Position the Main Equipment First
Set up:
- Monitor
- Keyboard
- Mouse
- Chair
before adding decorative objects and organizers.
For computer work, the monitor should generally sit directly in front of you rather than forcing you to turn repeatedly. OSHA guidance also recommends keeping the top line of the screen at or below eye level and placing the monitor at an appropriate viewing distance.
Keep the Keyboard and Mouse Together
Paper stacks and organizers should not push your mouse far to one side or leave the keyboard trapped behind trays.
Avoid:
- Documents filling the mouse area
- Storage trays blocking the keyboard
- Decorative objects occupying the primary work zone
Frequently used computer equipment should remain easy to reach.
Keep the Space Under the Desk Clear
Do not turn leg space into overflow storage.
Move items such as:
- Boxes
- Printer paper
- Bags
- Spare electronics
- Loose supplies
- Unnecessary cables
into proper storage if they interfere with sitting comfortably.
Position Reference Documents Intentionally
If you frequently move between paper and screen, consider a document holder positioned near the monitor.
This can keep frequently referenced material visible without spreading documents across the keyboard or desk.
Control Cables Before They Take Over the Workspace
Cable organization should make the desk easier to use, not simply make wires invisible.
Identify Every Cable
Before buying clips or sleeves, find out what every cable belongs to.
Common examples include:
- Computer power cable
- Monitor cable
- Phone charger
- Headphone cable
- Speaker cable
- Printer cable
- External drive connection
- Desk lamp power cord
Remove cables for equipment you no longer own or use.
Separate Permanent and Temporary Cables
Permanent cables might include:
- Monitor power
- Computer charger
- Printer
- Desk lamp
These can often be routed beneath or behind the desk.
Temporary cables might include:
- Phone charger
- Camera cable
- USB-C cable
- Memory-card reader
These should stay accessible rather than being permanently tied beneath the desk.
Route Permanent Cables Away From the Main Surface
Possible tools include:
- Cable tray
- Cable clips
- Cable sleeve
- Cable anchors
- Built-in desk routing
The aim is to reduce clutter on the work surface and keep walking areas clear.
Label Similar Cables
Labels are useful when several cords look identical.
For example:
- Monitor 1
- Monitor 2
- External drive
- Printer
- Laptop charger
This can make unplugging or troubleshooting equipment much easier.
Keep Electrical Safety in Mind
Do not create another problem while trying to make cables look neat.
Keep cords out of walkways and follow the ratings and instructions for extension cords, power strips, cable trays, and other electrical products.
Cable management should organize the workspace, not encourage unsafe electrical setups.
Give Paper Documents a Clear Workflow
Paper clutter often builds up because everything gets classified as “keep this for now.”
Instead, give every paper a next step.
Create One Inbox
Use one defined location for incoming paper.
This may include:
- Receipts
- Forms
- Notes
- Documents requiring signatures
Avoid creating several piles around the desk.
Create an Action Category
Use one folder or tray for documents that require:
- Payment
- Signature
- Reply
- Review
- Filing
- Scanning
Your entire desk should not function as an action tray.
Separate Action, Reference, and Archive Material
Think of paper in three distinct ways.
Action:
Something still needs to be done.
Reference:
You may need to look at it again.
Archive:
It needs to be kept but rarely accessed.
Only active documents should compete for prime desk space.
Archive Older Material
Move documents that need to be retained into:
- Filing cabinet
- Labeled storage box
- Secure document storage
- Appropriate digital archive
Avoid keeping every historical record directly beside your current work.
Dispose of Sensitive Documents Carefully
Documents containing personal or financial information should be stored securely and disposed of appropriately when they are no longer needed.
Shredding may be appropriate for sensitive paperwork.
Do not assume one retention schedule applies to every tax, legal, health, or financial document. Requirements can vary.
Organize Office Supplies by Frequency
A desk full of neatly arranged supplies can still be cluttered if you rarely use most of them.
Keep a Small Daily Supply Set
For many people, a practical desktop supply set might include:
- Two or three pens
- Pencil
- Highlighter
- Sticky notes
- Scissors if frequently needed
Everything else can move into backup storage.
Create a Backup Supply Zone
Store extra supplies together.
Possible categories include:
- Pens
- Printer ink
- Paper
- Staples
- Batteries
- Notebooks
Use:
- Drawer unit
- Cabinet
- Shelf box
The desk should contain your working set, not your entire supply inventory.
Divide Small Items Inside Drawers
Drawer dividers and small containers can help with:
- Paper clips
- USB drives
- Batteries
- Sticky notes
- Stamps
- Charging adapters
Keep categories broad enough that the system remains easy to maintain.
Give Bulky Equipment a Permanent Home
Items such as:
- Printer
- Scanner
- Paper shredder
- Label maker
should have assigned locations.
Constantly moving bulky equipment between the desk and floor creates unnecessary clutter.
Use Vertical Storage in Small Home Offices
When floor and desk space are limited, use walls carefully.
Use Wall Shelves for Reference Items
Good candidates include:
- Books
- Binders
- Archive boxes
- Light supplies
Keep frequently used material within practical reach and move occasional items higher.
Use Pegboards or Wall Organizers for Active Tools
Possible items include:
- Headphones
- Scissors
- Notes
- Small tools
- Frequently used cables
The goal is functional storage rather than covering the wall with accessories.
Use Closed Storage for Visually Busy Supplies
Closed containers can hold:
- Replacement cables
- Printer supplies
- Paper
- Packaging materials
This can reduce visual clutter without removing useful supplies from the room.
Follow the Frequency Rule Vertically
Use this basic logic:
Daily items → easier reach
Occasional items → higher or farther away
Also follow the shelf or organizer manufacturer’s mounting and load instructions.
Organize Digital Clutter Alongside Physical Clutter
A clear desk does not help much if your computer is full of unnamed downloads and scattered files.
Treat digital organization as part of the same workspace system.
Create a Small Folder Structure
A simple starting point might be:
- Active Projects
- Clients / Work
- Admin
- Reference
- Archive
Avoid creating dozens of top-level folders.
The system should make filing decisions easier, not more complicated.
Use Consistent File Names
A simple format might be:
Project – Document – Date
For example:
Kitchen_Renovation_Quotes_2026-10
There is no single perfect file-naming method.
Consistency matters more.
Avoid Excessive Folder Depth
Too many nested folders can make navigation harder.
Keep the structure deep enough to stay organized but simple enough that you can quickly find what you need.
Some cloud services also have technical limitations involving extremely long file names or paths.
Clean the Desktop and Downloads Folder
Review:
- Screenshots
- Installers
- Temporary PDFs
- Duplicate downloads
- Abandoned files
- Files with confusing names
Process them using:
rename → move → archive/delete
Your Downloads folder should not become a permanent filing cabinet.
Use Your Cloud Storage Tools
Services such as Google Drive and OneDrive provide features for:
- Folders
- Subfolders
- Renaming
- Moving files
- Sorting
Some services also include version history or visual organization features.
Use the tools provided by your platform rather than creating a complicated manual system.
Be Careful When Cleaning Digital Storage
Storage-cleanup tools may identify:
- Temporary files
- Large files
- Unused apps
- Cloud-synced files
Review what is being removed before deleting anything important.
Home Office Organization by Problem
| Workspace Problem | Organization Move | Best Placement | Why It Helps |
|---|---|---|---|
| Desk covered with supplies | Keep only daily tools in primary zone | Desktop/top drawer | Preserves working surface |
| Mouse pushed aside by clutter | Clear computer-equipment zone first | Center of desk | Keeps main tools accessible |
| Loose charging cables | Cable clips or anchors | Desk edge | Keeps temporary cables reachable |
| Power cords everywhere | Under-desk cable management | Beneath/behind desk | Clears work surface and pathways |
| Paper piles | Inbox + action + archive system | Tray/file drawer | Gives papers a next step |
| Tiny supplies mixed together | Drawer dividers | Top/side drawer | Keeps categories visible |
| Too many backups on desk | Secondary supply zone | Cabinet/shelf | Protects prime workspace |
| Downloads folder overflowing | Rename/move/delete routine | Computer/cloud | Makes files easier to retrieve |
| Reference papers beside keyboard | Document holder | Near monitor | Keeps reference material organized |
| Office becomes cluttered daily | End-of-day reset | Whole workspace | Returns items to assigned homes |
These are organization strategies rather than guaranteed productivity outcomes.
Make Shared or Multipurpose Offices Easier to Reset
Not every home office has its own room.
Your workspace might be in a:
- Bedroom
- Living room
- Dining area
- Guest room
- Hallway nook
In these spaces, organization also needs to help the room return to normal after work.
Give Work Items a Defined Boundary
Possible storage options include:
- Rolling cart
- Cabinet
- Storage box
- Drawer unit
- Secretary desk
Work equipment should have somewhere to go when you are finished.
Separate Supplies in Shared Offices
For two people, create clear zones.
Person A:
- Drawer
- Shelf
- Headphone hook
Person B:
- Equivalent separate storage
Keep genuinely shared supplies in a neutral third area.
Create a “Work Closed” State
At the end of the day:
- Close or store the laptop.
- File papers.
- Return supplies.
- Contain loose cables.
- Put away the work bag.
This is particularly practical when the workspace occupies a room used for other purposes.
Use a Simple Daily Reset Routine
A useful office should not require a complete reorganization every weekend.
Short resets are easier to maintain.
End-of-Day Reset
Use this sequence as a practical starting point:
- Throw away obvious trash.
- Return pens and tools.
- Move papers into inbox, action, or file categories.
- Move downloads into the right digital folder.
- Connect necessary chargers.
- Clear the main working area.
- Note your first task for the next work session.
It may take more or less than five minutes depending on your setup.
Weekly Office Reset
Review:
- Inbox tray
- Action papers
- Downloads folder
- Computer desktop
- Supply levels
- Cable clutter
- Items that migrated into the office
Monthly or Occasional Review
Look for:
- Completed project folders
- Old supplies
- Duplicate cables
- Documents ready to archive
- Digital projects ready to archive
- Equipment you no longer use
Organization works better when maintenance is routine rather than something you do only after the room becomes overwhelming.
Common Home Office Organization Mistakes
Buying Organizers Before Knowing What They Need to Hold
Use this order:
inventory → categorize → measure → buy
A drawer organizer is not helpful if it does not match the drawer or the items going into it.
Keeping Everything Within Arm’s Reach
Prime desk space belongs to frequently used items.
Backups and occasional supplies can move farther away.
Organizing Around Décor Instead of Equipment
Plants, frames, and decorative trays should not push the monitor, keyboard, or mouse into awkward positions.
Set up the workstation first.
Decorate around it.
Using the Floor as Storage
Boxes beneath the desk can interfere with leg space and make cleaning more difficult.
Give them another home.
Keeping Every Cable “Just in Case”
Before storing an old cable, identify:
- Device
- Connector
- Whether you still use or own the equipment
Keep justified spares rather than an anonymous box of cords.
Filing Paper Without Processing It
Before filing, decide:
- Act
- Reference
- Archive
- Dispose
A filing cabinet full of undecided paper is still clutter.
Creating a Complicated Digital Folder Tree
More folders do not automatically mean better organization.
Keep your digital structure understandable and avoid unnecessary nesting.
Using the Desktop as Permanent Digital Storage
Active files should eventually move into their actual project folders.
Never Resetting the System
Even a good organization system eventually fails if items never return to their assigned places.
Organize Your Home Office in the Right Order
If your office is already cluttered, work through it in this sequence.
Step 1: Remove Items That Don’t Belong
Take out:
- Household overflow
- Empty packaging
- Cups
- Unrelated storage
- Items waiting to be returned elsewhere
Step 2: Establish the Workstation
Position:
- Chair
- Monitor
- Keyboard
- Mouse
before organizers and decoration.
Step 3: Create Desk Zones
Divide items into:
- Daily
- Secondary
- Occasional
Step 4: Process Paper
Create:
- Inbox
- Action
- Reference
- Archive/dispose
Step 5: Organize Supplies
Separate your working set from backup stock.
Step 6: Route Cables
Separate permanent and temporary connections.
Step 7: Add Vertical or Closed Storage
Do this only after you understand what the existing desk and drawers can already hold.
Step 8: Organize Digital Files
Create folders, rename files, and process Downloads and Desktop clutter.
Step 9: Establish Reset Routines
Use a short daily reset and a more thorough weekly review.
The overall framework is:
Workstation → workflow → storage → digital → maintenance
Frequently Asked Questions About Home Office Organization
What Are the Best Home Office Organization Ideas?
Start with:
- Clear desk zones
- Cable management
- Inbox and action folders for paperwork
- Drawer dividers for small supplies
- Secondary storage for backups
- Simple digital folders
- Daily and weekly reset routines
Reserve the easiest-to-reach areas for the tools you use most often.
How Do I Organize a Cluttered Home Office?
Use this order:
- Remove unrelated items.
- Clear the main work surface.
- Position your computer equipment.
- Group supplies by frequency.
- Process paper.
- Route cables.
- Organize digital files.
- Add storage only if a genuine storage gap remains.
What Should Stay on a Home Office Desk?
Usually only frequently used work tools.
Possible examples include:
- Monitor or laptop
- Keyboard
- Mouse
- Notebook
- Pen
- Phone
- Current documents
Backups and occasional supplies should usually move to drawers, cabinets, or shelves.
How Do I Organize Cables Under a Desk?
First identify every cable.
Remove unused cords, separate permanent connections from temporary charging cables, then use an appropriate:
- Cable tray
- Sleeve
- Clip
- Anchor
for the permanent cables.
Keep cords out of walking areas and follow the electrical product’s safety and load instructions.
How Should I Organize Home Office Documents?
Use four broad stages:
Incoming → Action → Reference/Archive → Dispose
This gives every paper a next step rather than allowing documents to accumulate across the desk.
Store sensitive documents securely and dispose of them appropriately when they are no longer needed.
How Do I Organize Computer Files for Work?
Create a small number of meaningful top-level folders, use consistent descriptive file names, avoid excessive folder nesting, and routinely process your Desktop and Downloads folders.
The simplest system is usually one you can follow without thinking about it every time you save a file.
How Can I Organize a Home Office in a Small Room?
Prioritize:
- Compact desk
- Wall shelves
- Wall organizer
- Drawer unit
- Closed boxes
- Mobile storage cart
- Cable management
Keep occasional supplies away from the primary work surface and use vertical storage where appropriate.
Conclusion
A productive-looking office is not necessarily an organized office.
A useful workspace makes everyday actions simple:
- Sit down.
- Reach the tools you need.
- Find the current document.
- Save digital files where they belong.
- Put supplies away.
- Finish with a clear work surface.
Use this framework:
Place → prioritize → contain → route → file → reset.
Position your workstation before adding storage. Keep frequently used tools in the primary desk zone. Move backup supplies farther away. Route permanent cables away from the working surface. Give every paper a next action and organize digital files alongside physical ones.
Most importantly, make the system easy to reset.
Start with just the main desk surface. Clear it completely, then return each item one by one based on how often you genuinely use it. Anything that does not deserve prime workspace can move somewhere better.