
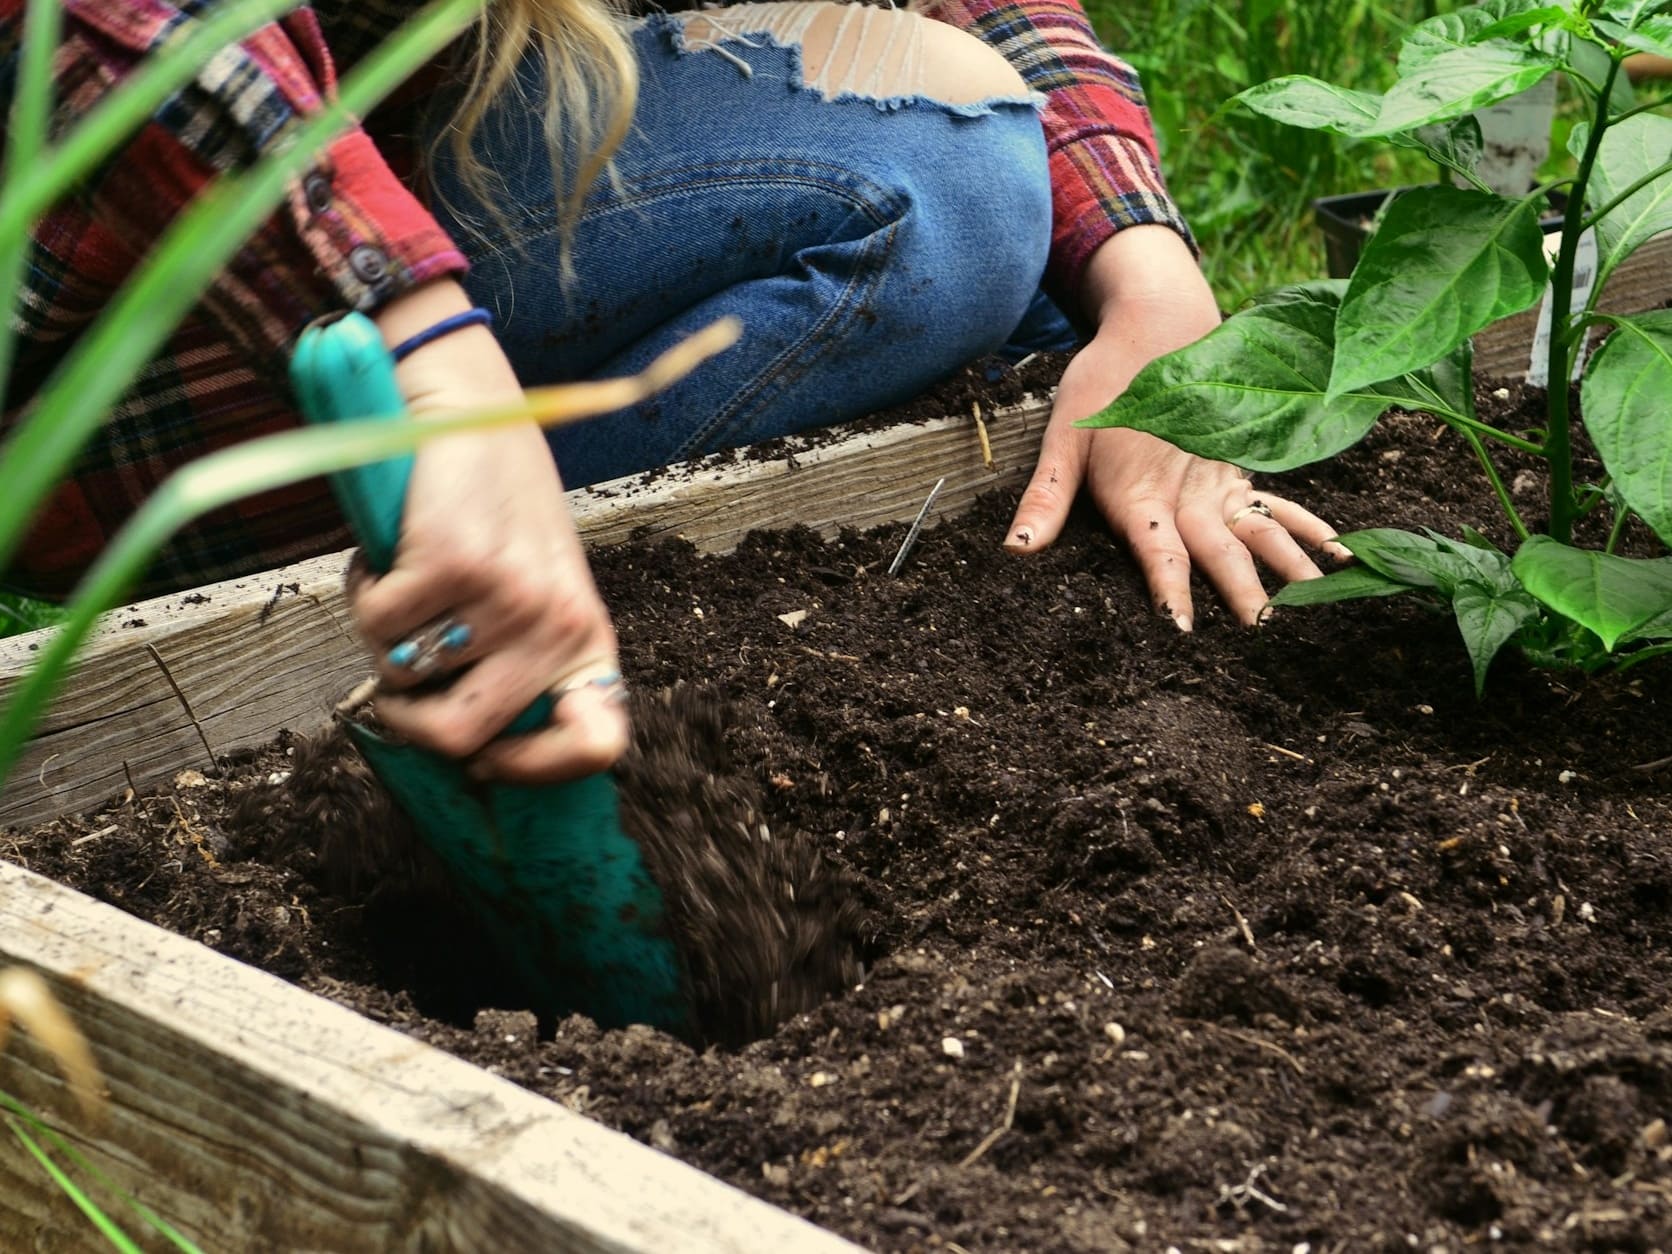
A raised garden bed can look almost foolproof: build a box, add soil, plant vegetables, and water. In reality, many beginner problems start before the first seed goes into the ground. The bed may end up in too much shade, become too wide to reach comfortably, get filled with unsuitable soil, or become so crowded that mature plants compete for light and water.
The most important lesson in raised bed gardening for beginners is simple: design the bed around the plants and the gardener rather than around a standard box size. Your location, access, soil, crop choices, spacing, and watering plan matter more than how decorative the frame looks.
A useful order is:
Crop → site → access → bed → soil → plan → plant → water → maintain → replant
Get those decisions right first, and the raised bed becomes much easier to manage through the growing season.
Decide Whether a Raised Bed Is Right for Your Garden
Raised beds are useful, but they are not automatically better than growing directly in good garden soil.
Raised Beds Can Improve Difficult Growing Areas
A raised bed can be especially useful when your existing ground is:
- Compacted
- Poorly drained
- Shallow
- Difficult to work
- Otherwise unsuitable for productive gardening
Because you normally work from paths rather than walking through the growing area, raised beds can also reduce soil compaction.
They may also make gardening easier to reach, particularly when you choose a height that reduces bending.
A Raised Bed Does Not Remove Basic Plant Needs
Vegetables still need:
- Suitable sunlight
- Appropriate soil
- Water
- Nutrients
- Enough growing room
- Temperatures suited to the crop
If your existing soil is already fertile, workable, and well drained, an in-ground vegetable garden may grow crops just as successfully.
A raised bed is a tool for solving particular problems. It is not a guarantee of better plants.
Understand the Trade-Offs
Raised beds can also require:
- Upfront construction cost
- Soil or growing mix
- More frequent moisture checks
- Frame maintenance
- Additional irrigation planning
Raised soil often dries faster than surrounding ground, so a bed that looks convenient in spring may become frustrating in summer if the nearest water source is far away.
Choose the Raised Bed Location Before You Build It
Location is one of the hardest mistakes to correct later.
A poorly positioned bed cannot be moved easily once it is filled with soil and planted.
Match Sunlight to Your Crops
Start with what you want to grow.
Sun-loving crops such as:
- Tomatoes
- Peppers
- Eggplants
generally need substantial direct sunlight. University of Minnesota Extension uses roughly six to eight hours of sunlight as a useful guideline for these crops.
A slightly less sunny area may still work for crops such as:
- Lettuce
- Radishes
- Scallions
- Baby kale
- Beet greens
Do not assume one sunlight requirement applies to every vegetable.
Look for Level, Well-Drained Ground
Choose a location where possible that:
- Does not regularly collect standing water
- Is reasonably level
- Has good sunlight for your crops
- Is easy to approach from the paths
Avoid building first and discovering after heavy rain that water collects around the bed.
Keep Water Nearby
Raised beds often dry more quickly than in-ground gardens.
Place the bed where it is practical to use:
- Hose
- Watering can
- Drip irrigation
- Soaker hose
- Rainwater supply where appropriate
If watering the bed requires dragging a hose across the entire property every day during hot weather, routine care becomes harder than it needs to be.
Observe the Site Before Committing
Watch your proposed location at different times of day.
Check:
- Morning sun
- Afternoon sun
- Building shadows
- Nearby trees
- Drainage after rain
- Root competition
- Walking access
A location that appears sunny at noon may be shaded for much of the morning or afternoon.
Think About Bed Orientation
Where practical, a north-to-south orientation for a long bed can help distribute light more evenly.
But orientation should not override more important realities such as:
- Buildings
- Existing shade
- Property shape
- Access
- Slope
Choose the best workable location rather than forcing a textbook orientation into a poor site.
Size the Bed for Reach, Crops, and Access
There is no single perfect raised-bed dimension.
The right size depends on your reach, the space available, the crops you want to grow, and what lies beneath the bed.
Make the Bed Narrow Enough to Reach the Center
The main rule is:
You should be able to reach the middle without stepping into the bed.
Many raised beds are around three to four feet wide when accessible from both sides, but the exact width should depend on your reach.
If the bed sits against:
- Fence
- Wall
- Hedge
- Other inaccessible edge
make it narrower so you can comfortably reach the far side.
Avoid designing a beautiful wide bed that forces you to stand on the growing soil whenever you weed or harvest.
Let Length Fit the Garden
Length is more flexible.
Consider:
- Available space
- Number of crops
- Path layout
- Construction material
- Structural reinforcement
An extremely long bed may save a little construction material, but it can also become annoying if you constantly have to walk around the entire structure.
Several manageable beds can be easier to work with than one very long bed.
Understand Raised-Bed Depth
Depth is often misunderstood.
If the Bed Sits Over Good Garden Soil
Plant roots may continue below the raised portion and into the natural soil.
In that case, the frame itself does not necessarily need to contain the plant’s entire root system.
If the Bed Sits on Concrete or Another Hard Surface
The situation changes.
Roots cannot continue into natural soil below, so the bed needs to provide enough usable growing depth within the structure itself.
This also makes:
- Drainage
- Soil volume
- Watering
more important.
Choose Height for Function, Not Appearance Alone
A taller bed can be useful because it may:
- Reduce bending
- Improve access
- Raise plants closer to working height
But taller beds also:
- Require more soil
- Cost more to fill
- May dry faster
- May require stronger walls or reinforcement
Choose height based on your needs, not simply because tall raised beds look attractive in photographs.
Plan the Paths Too
Leave enough room around beds to:
- Walk comfortably
- Carry tools
- Use a hose
- Reach all sides
- Move a wheelbarrow where needed
If accessibility is a priority, you may need wider paths than a typical compact garden layout.
Choose Raised Bed Materials Carefully
Raised beds do not need to be built from wood.
Possible materials include:
- Wood
- Metal
- Brick
- Stone
- Concrete block
- Composite materials
- Recycled plastic
- No frame at all
A simple raised mound can also function as a raised growing area without a permanent enclosure.
Wood
Wood is popular because it is:
- Easy to cut
- Widely available
- Familiar for DIY projects
- Relatively simple to assemble
Common considerations include:
- Cost
- Rot resistance
- Treatment history
- Expected lifespan
Cedar is naturally more resistant to decay than many common softwoods, while untreated pine is usually less durable when repeatedly exposed to soil and moisture.
Masonry and Block
Brick, stone, and concrete block can create durable beds.
However, consider:
- Cost
- Installation effort
- Weight
- Structural stability
- Local climate
Permanent masonry beds are also harder to relocate later.
Metal Beds
Prefabricated metal beds can offer:
- Thin walls
- Easy assembly
- Long-lasting construction depending on product
Do not assume that every metal bed overheats soil or that metal is always superior to wood.
Performance depends on the material, design, climate, bed size, and growing conditions.
Be Careful With Reclaimed Materials
Unknown reclaimed timber can be risky for food-growing areas because you may not know how it was treated.
University of Georgia Extension specifically advises against using creosote-treated railroad ties and utility poles for edible raised beds.
Free materials are not always worth the uncertainty.
Understand Treated Wood Before Using It
Modern pressure-treated wood is not identical to older treated lumber.
If you are considering it:
- Identify the actual product.
- Check current manufacturer information.
- Follow local guidance.
- Consider your gardening preferences and whether organic-certification requirements matter to you.
Avoid simple blanket statements that every treated board is either completely safe or completely unsafe.
Prepare the Ground Before Filling the Bed
The area underneath the raised bed still matters.
Remove Problem Vegetation
Before installing the frame, deal with:
- Turf
- Large perennial weeds
- Persistent roots where practical
Starting with an established weed problem underneath the bed can make future maintenance more difficult.
Loosen Compacted Soil Below the Bed
If your raised bed sits directly on ordinary garden soil, loosening compacted ground underneath can make it easier for:
- Water to move
- Roots to extend deeper
- Raised-bed soil to connect with native soil
You do not necessarily need to completely turn the ground over.
Avoid a Solid Bottom Without a Reason
A normal vegetable bed sitting over usable soil can benefit from having access to the ground below.
A solid base makes more sense in situations such as:
- Elevated planters
- Beds over pavement
- Sites where contaminated soil must be isolated
Do not treat those situations as identical to an ordinary raised bed on garden soil.
Consider Soil Testing
A soil test can help you understand:
- Nutrient levels
- pH
- Amendment needs
Testing can be particularly useful before adding large amounts of fertilizer or compost.
If there is a reason to suspect soil contamination, seek appropriate local soil-testing guidance before growing food.
Fill the Bed With Soil That Holds Water and Still Drains
Your raised-bed soil is one of the most important parts of the entire garden.
Good soil must provide roots with:
- Water
- Air
- Nutrients
- Physical support
- Drainage
Don’t Fill the Bed Entirely With Compost
Compost is valuable, but pure compost is not automatically an ideal raised-bed growing medium.
Repeated heavy compost additions can contribute to excessive nutrient levels, including phosphorus, and may increase soluble salts.
Think of compost as one useful component rather than the entire soil system.
Use a Balanced Growing Mix
A raised-bed mixture commonly combines:
- Mineral soil or suitable topsoil
- Compost or other organic matter
- Other components where needed for structure or drainage
There is no single universal recipe.
Recommendations vary because local soil, compost, climate, bed depth, and available materials differ.
Match Soil to the Type of Bed
A raised bed over natural soil can interact with the ground below.
A bed on concrete behaves more like a large container.
That difference affects:
- Drainage
- Root space
- Moisture
- Soil depth
Use a growing medium appropriate for the actual situation rather than copying one recipe from another gardener.
Don’t Fill the Root Zone With Random Waste
Trying to save soil by filling much of the bed with random bulky material can reduce the useful growing volume.
The primary root zone should contain suitable growing media.
Expect the Soil Level to Settle
Organic matter breaks down over time, and raised-bed soil commonly settles.
Monitor the soil level between seasons.
Add suitable soil or organic matter when needed, but do not automatically add large amounts of compost every year without considering nutrient levels.
Use Soil Testing Instead of Guessing
A soil test can help guide decisions about:
- Fertilizer
- pH adjustment
- Nutrient additions
- Amendments
If the soil already contains plenty of a nutrient, adding more does not improve the bed.
Choose Crops Before Planning the Layout
Do not start by buying ten different seed packets and trying to squeeze them into one small bed.
Choose a manageable crop list first.
For broader crop-selection and seasonal basics, Mellora’s Vegetable Gardening for Beginners: A Simple Guide From Planting to Harvest can help you plan the full growing cycle.
Grow Food You Actually Want to Eat
A beginner bed might contain a manageable mix such as:
- Lettuce
- Radishes
- Bush beans
- Herbs
- One tomato or pepper where climate permits
Other crops may be equally suitable depending on your local season.
Avoid calling any vegetable universally easy. Lettuce may be simple in cool weather but struggle in heat. Tomatoes may perform beautifully in one climate and require much more care in another.
Think About Mature Size
Seedlings are misleadingly small.
Compact crops
Examples include:
- Lettuce
- Radishes
- Many herbs
Medium-size crops
Examples include:
- Peppers
- Bush beans
- Some brassicas
Large or sprawling crops
Examples include:
- Tomatoes
- Squash
- Cucumbers
A small squash seedling may occupy little room at planting time and then spread dramatically later.
Plan for the mature plant.
Use Vertical Space
Trellising can help some crops use less ground area.
Possible candidates include:
- Pole beans
- Peas
- Some cucumbers
- Indeterminate tomatoes with suitable support
Make sure the support is appropriate for the crop.
Consider Shade From Tall Crops
Place trellised or tall plants where they will not unnecessarily shade shorter crops.
The best side depends on:
- Sun path
- Season
- Bed orientation
- Nearby structures
Plan for Your Growing Season
Crop choices should reflect:
- Local temperatures
- Frost dates
- Heat tolerance
- Cold tolerance
- Days to maturity
- Length of growing season
A bed plan that works in one region may be completely wrong somewhere else.
Space Plants for Their Mature Size
Raised beds can use space efficiently because you do not need walking rows inside the growing area.
That does not mean you can ignore plant spacing.
Follow Crop-Specific Guidance
Use:
- Seed packet
- Plant label
- Trusted extension crop guide
for spacing.
Do not rely on one universal raised-bed spacing chart.
Different vegetables can have dramatically different mature sizes.
Don’t Confuse Intensive Planting With Overcrowding
Closer planting may sometimes make sense, but plants still compete for:
- Light
- Water
- Nutrients
Crowding may also make care more difficult and reduce air movement.
Use the Whole Growing Area
Instead of traditional field-style rows, a raised bed can often use:
- Blocks
- Grids
- Offset rows
- Trellised edges
as long as crop-specific spacing is respected.
Thin Seedlings When Needed
Small seeds are easy to sow too closely.
If too many seedlings emerge, thin them according to crop guidance.
Leaving every seedling because it looks healthy at two centimeters tall can create severe crowding later.
Use Succession Planting Instead of Overcrowding
You do not need every crop in the bed at the same time.
Succession planting uses the same growing space at different points in the season.
Replace Finished Crops
Depending on your climate, possible sequences might include:
- Spring lettuce followed by summer beans
- Peas followed by a warm-season crop
- Early radishes followed by another vegetable
These are examples rather than universal calendars.
Sow Fast Crops in Smaller Batches
Instead of planting all your radishes or greens on one day, small successive sowings can spread the harvest.
Draw a Seasonal Plan
Create a simple sketch showing:
- Spring crops
- Summer crops
- Fall crops where climate allows
This is often a better way to increase productivity than planting everything too close together.
Water Raised Beds Based on Soil Moisture
Raised beds commonly dry more quickly than nearby in-ground soil.
For that reason, watering deserves close attention.
Don’t Water by Calendar Alone
Your raised bed’s moisture changes with:
- Temperature
- Rain
- Wind
- Soil mix
- Crop
- Plant maturity
- Bed depth
- Bed material
A rule such as “water every three days” may work temporarily and fail completely after the weather changes.
Check the Soil
Look below the surface rather than judging only by appearance.
The top layer can look dry while deeper soil remains moist—or appear damp shortly after light watering while the root zone remains dry.
Water Near the Root Zone
Suitable methods may include:
- Watering can
- Drip irrigation
- Soaker hose
These can deliver water close to the soil rather than spraying the whole garden unnecessarily.
If you use an irrigation system, follow the manufacturer’s setup and flow guidance.
Water Deeply Enough
Repeated tiny surface wettings may encourage shallow moisture without adequately wetting the deeper root zone.
The actual amount required depends on:
- Plant
- Soil
- Weather
- Root depth
- Bed construction
Monitor Beds on Hard Surfaces Closely
A raised bed over concrete cannot borrow moisture from the soil below.
That can make moisture management even more important.
Mellora’s guide How Often Should You Water Container Plants? A Practical Guide to Getting It Right also explains useful moisture-checking principles, although containers and raised beds are not identical growing systems.
Mulch and Feed Without Overdoing It
A productive raised bed does not need constant feeding.
Use Mulch Where Appropriate
Organic mulch can help:
- Reduce moisture loss
- Suppress some weeds
- Protect exposed soil
Suitable mulch type and depth depend on:
- Crop
- Climate
- Season
- Soil temperature
- Seedling stage
Avoid burying small seedlings under heavy mulch.
Feed According to Need
Do not fertilize simply because vegetables are growing in a raised bed.
Base feeding decisions on:
- Soil test
- Crop needs
- Plant condition
- Fertilizer label
More fertilizer is not automatically better.
Replenish Organic Matter Thoughtfully
Organic material decomposes, so the soil level may gradually fall.
You may need to add appropriate organic matter or soil between seasons.
But repeated excessive compost use can create nutrient imbalances.
Maintain the Raised Bed Without Compacting the Soil
One of the main advantages of a properly sized raised bed is that you can do nearly all maintenance from the paths.
Don’t Walk in the Bed
Walking on the soil can compact it.
Instead:
- Reach from both sides
- Use paths
- Keep tools accessible from outside the bed
This is another reason bed width matters.
Remove Weeds Early
Raised beds are not automatically weed-free.
Weeds may arrive through:
- Wind-blown seeds
- Soil
- Compost
- Edges
- Perennial roots
Small weeds are usually easier to remove before they establish deep roots.
Monitor Soil Level
If the bed settles significantly, add suitable material when appropriate.
Do not automatically refill it to the top with rich compost every year.
Inspect the Frame
Check periodically for:
- Rot
- Bowing
- Loose fasteners
- Corrosion
- Moving masonry
Large or tall beds may need extra reinforcement depending on how they were constructed.
Maintain the Paths
Paths can become:
- Muddy
- Weedy
- Difficult to access
Possible path materials include:
- Wood chips
- Bark
- Pavers
- Other suitable materials
Review the Garden Between Seasons
Before planting again, check:
- Soil level
- Irrigation
- Frame condition
- Previous crop performance
- Pest or disease issues
- Next crop plan
Raised Bed Decisions at a Glance
| Decision | Beginner Starting Point | Why It Matters | Avoid |
|---|---|---|---|
| Location | Sunny area matched to crops | Determines usable light | Building before checking sun |
| Water access | Keep reasonably close to water | Raised beds can dry quickly | Difficult irrigation access |
| Width | Narrow enough to reach the center | Helps avoid soil compaction | Bed you must step into |
| Height | Match access and site | Changes fill volume and maintenance | Choosing height only for appearance |
| Depth | Match crops and surface below | Determines available root volume | Shallow bed on concrete for deep crops |
| Material | Use known, appropriate material | Influences cost and durability | Unknown reclaimed treatments |
| Soil | Balanced raised-bed mix | Supports roots and moisture | Pure compost or poor fill |
| Crop plan | Start with a few suitable crops | Simplifies management | Planting everything at once |
| Spacing | Follow crop-specific guidance | Reduces overcrowding | Planning around seedling size |
| Watering | Check actual soil moisture | Water needs constantly change | Blind fixed schedules |
| Maintenance | Weed, inspect, replenish as needed | Keeps the bed usable | Over-amending and compacting soil |
These are planning principles rather than rigid specifications. Your climate, crops, soil, materials, site, and the surface beneath the bed should shape the final decisions.
Common Raised Bed Gardening Mistakes
Building Before Checking Sunlight
Do not choose a location just because the bed looks good there.
Observe the light first.
Making the Bed Too Wide
If you must step inside to reach the center, the design is working against you.
Choosing a Very Tall Bed Without Considering Fill
A larger bed requires considerably more growing medium and may need stronger construction.
Using Unknown Reclaimed Wood
Avoid materials with uncertain chemical treatments around edible crops.
Creosote-treated railway timbers are one example specifically discouraged for food-growing beds.
Filling the Bed With Pure Compost
Compost is an amendment, not automatically a complete raised-bed soil.
Ignoring the Soil Underneath
If the bed sits on usable soil, roots may benefit from extending below the frame.
Planting Too Much
Small transplants can become large mature plants.
Ignoring Crop Spacing
Raised-bed gardening does not eliminate plant competition.
Forgetting About Vines
Cucumbers, squash, and similar plants need either:
- Room to spread
- Appropriate trellising
- Strategic placement at the bed edge
Watering on a Fixed Schedule
Check the soil instead.
Fertilizing Automatically
Feed according to crop and soil needs.
Walking Inside the Bed
Work from the paths whenever possible.
Ignoring Seasonal Opportunities
When one crop finishes, suitable succession planting can make the space productive again.
How to Start a Raised Bed Garden in the Right Order
If you are starting from zero, use this process.
Step 1: Choose the Crops
Select a manageable number of crops suited to your climate and household.
Step 2: Observe the Site
Check:
- Sun
- Shade
- Drainage
- Water access
- Walking access
Step 3: Check What Is Under the Bed
Determine whether it will sit on:
- Usable soil
- Compacted ground
- Pavement
- Another hard surface
Step 4: Choose Dimensions
Base them on:
- Reach
- Crop needs
- Accessibility
- Site size
Step 5: Select Materials
Compare:
- Cost
- Durability
- Treatment
- Construction difficulty
Step 6: Prepare the Ground
Remove problem vegetation and loosen compacted soil where appropriate.
Step 7: Fill With Suitable Soil
Use a balanced growing medium rather than random filler.
Step 8: Test and Amend Where Needed
Use soil-test recommendations instead of guessing.
Step 9: Draw the Crop Layout
Include:
- Mature plant sizes
- Trellises
- Sprawling crops
- Shade considerations
Step 10: Plant at Appropriate Spacing
Follow trusted crop-specific guidance.
Step 11: Monitor Moisture
Water based on actual conditions rather than a calendar.
Step 12: Mulch and Maintain
Watch:
- Weeds
- Moisture
- Soil level
- Nutrient needs
- Frame condition
Step 13: Replant Empty Space
Use succession planting when climate and season allow.
Remember:
Crop → site → access → bed → soil → plan → plant → water → maintain → replant
Frequently Asked Questions About Raised Bed Gardening
Is Raised Bed Gardening Good for Beginners?
Yes, it can be.
Raised beds can provide:
- Manageable growing areas
- Easier access
- Greater control over the soil
- Less foot traffic and compaction
They still require suitable sunlight, watering, spacing, soil, and crop care.
Where Should I Put a Raised Garden Bed?
Choose the location according to what you want to grow.
Sun-loving vegetables such as tomatoes and peppers generally perform best with substantial direct sunlight.
Also consider:
- Drainage
- Level ground
- Water access
- Comfortable paths
How Wide Should a Raised Bed Be?
There is no single required width.
A practical guideline is to keep the bed narrow enough that you can comfortably reach the center without stepping into it.
Beds accessible from both sides can usually be wider than beds positioned against a wall or fence.
How Deep Should a Raised Bed Be?
Depth depends on:
- Crop
- Existing soil
- Surface underneath
- Desired bed height
A bed over healthy garden soil can allow roots to continue below the frame.
A bed on concrete must provide the root zone within the bed itself.
What Should I Fill a Raised Bed With?
Use a balanced growing medium that provides:
- Soil structure
- Organic matter
- Water retention
- Drainage
- Nutrients
Exact recipes vary, so use local extension guidance and soil-test information rather than assuming one mix works everywhere.
Can I Fill a Raised Bed Entirely With Compost?
That is generally not the best default approach.
Compost is useful, but excessive amounts may contribute to nutrient imbalances and soluble-salt buildup.
Use it as part of a balanced growing medium.
How Close Can Vegetables Be Planted?
Follow crop-specific spacing.
A raised bed can use space efficiently because no walking rows are required inside it, but plants still need adequate room for:
- Roots
- Light
- Water
- Air movement
How Often Should I Water a Raised Bed?
There is no universal schedule.
Check soil moisture and adjust according to:
- Weather
- Crop
- Plant size
- Bed depth
- Soil mix
Raised beds often dry faster than nearby in-ground soil.
Can I Put a Raised Bed on Concrete?
Yes, but the bed behaves more like a large container.
You need to pay particular attention to:
- Root depth
- Drainage
- Growing medium
- Watering
because roots cannot extend into natural soil underneath.
Conclusion
Successful raised bed gardening for beginners starts before you build the frame.
Begin with:
Crop → site → access → bed → soil → plan → plant → water → maintain → replant
Choose crops you genuinely want to grow, then find a location with appropriate sunlight, drainage, access, and convenient watering.
Design the bed so you can reach the center without stepping on the soil. Match its depth to both the crops and the surface beneath it, and choose construction materials with a known history and suitable durability.
Fill the bed with a balanced growing medium instead of relying entirely on compost or cheap filler. Plan around mature plant size, follow crop-specific spacing, and use trellising where it genuinely helps.
Water according to soil moisture rather than a fixed calendar. Use mulch and fertilizer according to actual conditions, keep your feet out of the growing area, and inspect the frame and soil between seasons.
You also do not need to fit the entire year’s garden into the bed at once. Succession planting can let the same space support different crops at different times.
Before buying lumber, metal panels, or soil, start with a simple sketch. Choose three to five crops you genuinely want to grow, observe your proposed site for sunlight and drainage, and draw a bed you can comfortably reach from every necessary side. That small amount of planning can prevent many of the most common raised-bed mistakes.